Time Machine offers a very basic backup with very few customization options, so setting up CCC to mimic "a Time Machine backup" is simple.
Choose "Macintosh HD" as the source
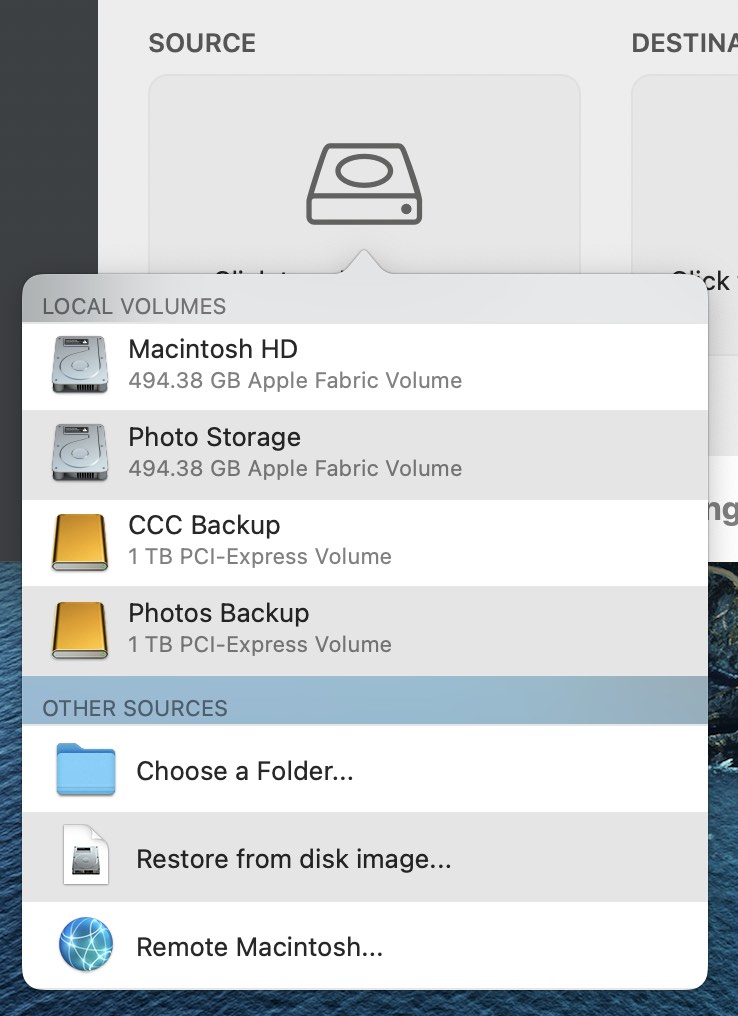
By default, Time Machine backs up your "Macintosh HD" disk. Click on CCC's Source selector and choose Macintosh HD as the source to your backup task.
Choose your backup disk as the destination
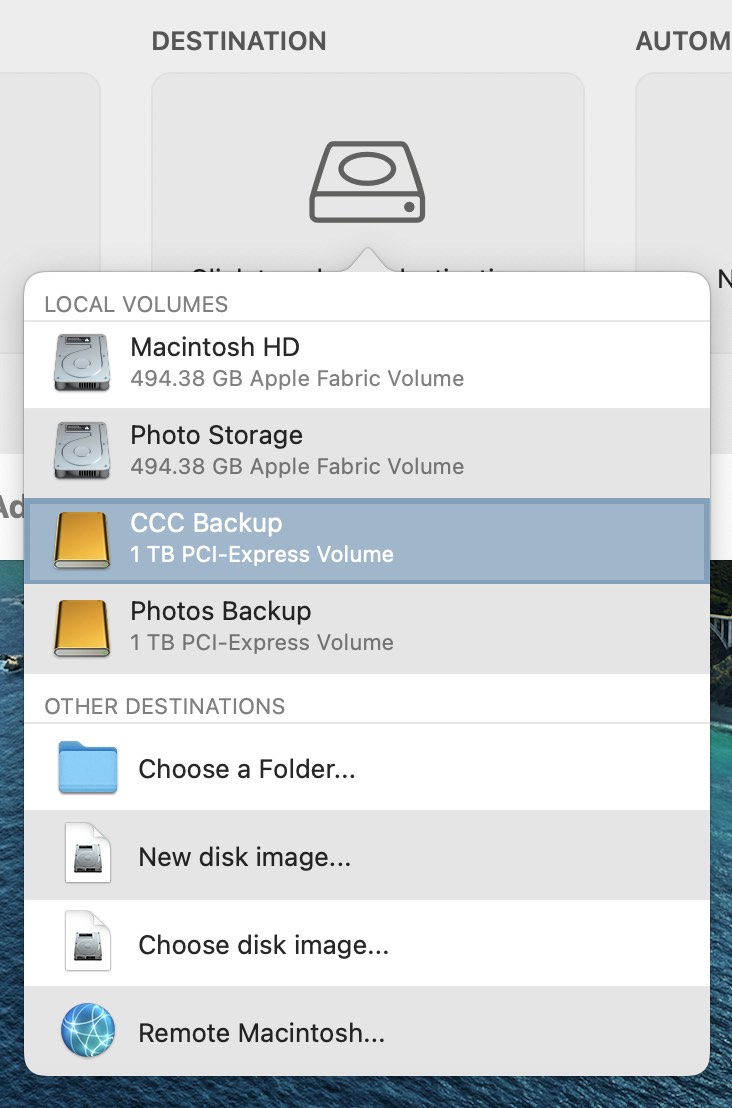
The most common Time Machine setup is to back up to an external disk that is connected to your Mac. In CCC, simply select that drive as your destination.
Can I use my Time Machine backup disk for my CCC backups?
CCC and Time Machine cannot share a backup volume, but the backups can reside on the same disk. If you select a Time Machine backup volume as the destination to your task, CCC will automatically create a new volume on that disk. If you want to replace Time Machine entirely with CCC, you can select the Time Machine backup volume in Disk Utility, then click the "-" button in the toolbar to remove that volume. For additional configuration options for your backup disk, see this section of CCC's documentation: I want to back up multiple Macs or source volumes to the same hard drive
Set "Automation" to run hourly
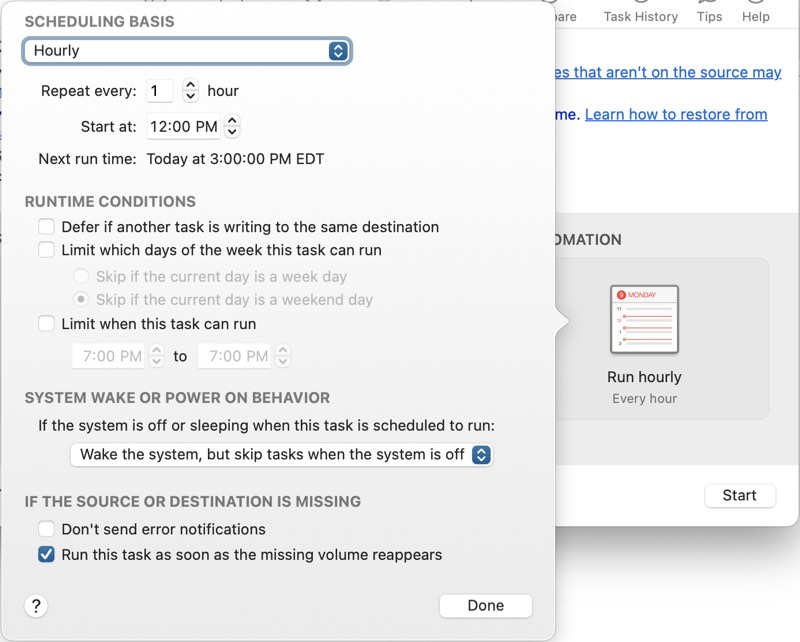
Time Machine requires that your backup runs every hour, or manually – that's it. In CCC, click on the Automation box, then choose Hourly from the Scheduling Basis popup menu (or any other timing that suits your preference).
That's it! You have now matched Time Machine feature-for-feature. But why stop there, there is a bunch of other functionality in CCC that will greatly enhance your backup strategy. Check out these other features of CCC:
- Integrity checking of files on the source and destination — proactively detect and deter "bit rot"
- Make incremental updates to your backup even faster with Quick Update
- See detailed backup history, granular error reporting, and a list of changes made in each task event
- Compare the source and destination to see what the current differences are
- Apply granular control over what should and should not be included in your backups
- Apply granular control over when your backup tasks run
Encrypting backups
If you're setting up a new backup volume, erase it as "APFS Encrypted" in Disk Utility.
If you simply want to encrypt your current backup, right-click on it in the Finder and choose the option to Encrypt it.
Related documentation
Menu bar icon
Time Machine offers a menu bar icon that tells you the current status of Time Machine, and gives you an option to manually run the backup or "Enter Time Machine" (view older snapshots of files). CCC also has a menu bar icon with status information for all your backup tasks and notification preferences.
Browsing your file history
You can use CCC's Snapshot Navigator to browse older versions of your files:
- Click Restore in CCC's toolbar
- Click on the Source selector and choose your backup disk as the source
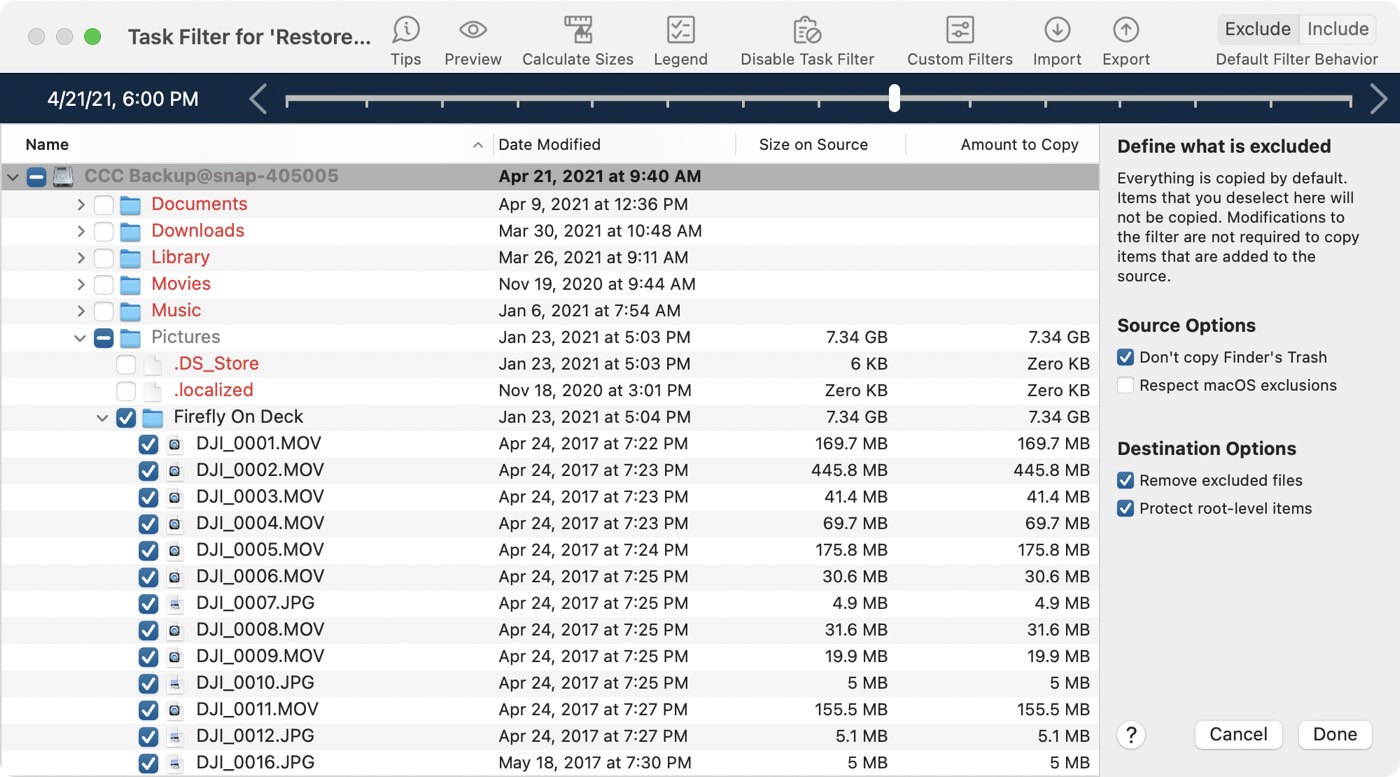
- Click Task Filter at the bottom of the window
- Select a file, then use the navigation controls to navigate backwards and forwards through your backup history
For additional details about restoring from a backup, including tutorial videos, see this section of CCC's documentation: Restoring an older version of a backup
Backing up to a network volume
When making a backup to a network volume, Time Machine backs up to a disk image. You could certainly configure CCC to back up to a disk image on a NAS volume too — choose "New Disk Image..." in CCC's Destination selector to set that up.
But we don't recommend that, in fact we explicitly discourage it. NAS-hosted disk images are very sensitive to network connectivity loss, and that fragility eventually leads to corruption of the disk image. You see that with Time Machine too — there are countless reports of "The (Time Machine) backup is corrupt, it needs to be recreated" on the Internet, and most of those would trace back to corruption of the disk image.
You can select a NAS volume, or a folder on a NAS volume as the destination to a CCC backup task. We specifically present this direct-to-NAS functionality in contrast to the inflexibility that Time Machine offers. But we also recommend using NAS backups only as a secondary option for a subset of your most important data. For the most reliable primary backup, and also for more functionality from your backup, we recommend that you procure a USB or Thunderbolt hard drive and create a backup on that locally-attached disk. Local backups are much simpler, faster, compatible with Migration Assistant, and offer file versioning via snapshots.