- Wiederherstellen von Daten auf einen neuen oder anderen Mac
- Wiederherstellen einer alten Version eines Backups
- Wiederherstellen eines Ordners aus einem Backup
- Wiederherstellen aus einem Backup mithilfe von CCC
- Wiederherstellen Ihres Startvolumes aus einem alten Backup
- Wiederherstellen alter Versionen von Dateien mit dem CCC Schnappschuss-Navigator
- Dateien aus einem SafetyNet-Schnappschuss auf dem Ziel wiederherstellen
- Wiederherstellen Ihres Startvolumes aus einem CCC Backup mithilfe des Migrationsassistenten
- Umgehen der Einschränkung des Migrationsassistenten
- Wiederherstellen des Startvolumes von einer alten startfähigen Kopie von macOS
- Wiederherstellen aus einem Backup auf einem NAS oder einer Netzwerkfreigabe
- Migrieren von Daten von einem Apple Silicon Mac, der im „Volume teilen“ Modus gestartet ist
- Wiederherstellen von einem Disk Image
- Wiederherstellen aus einem Backup auf einem entfernten Mac
Wiederherstellen von Daten auf einen neuen oder anderen Mac
Wenn Sie all Ihre Daten auf einen neuen oder anderen Mac übertragen möchten, sollten Sie generell den Migrationsassistenten verwenden, und keine Wiederherstellung per CCC durchführen.
Zugehörige Artikel
Wiederherstellen einer alten Version eines Backups
Drag & Drop per Finder
Finden und Wiederherstellen einzelner Dateien und Ordner aus dem CCC Backup
Im Finder können Sie per Drag & Drop einzelne Elemente von Ihrem Backup-Volume wiederherstellen — suchen Sie das Element einfach auf der Backup-Festplatte und ziehen Sie es zurück auf das Startvolume. Wenn das gesuchte Objekt im Finder versteckt ist oder sich in einem versteckten Ordner befindet, drücken Sie Command+Umschalt+Punkt, um die Anzeige der versteckten Objekte im Finder umzuschalten.
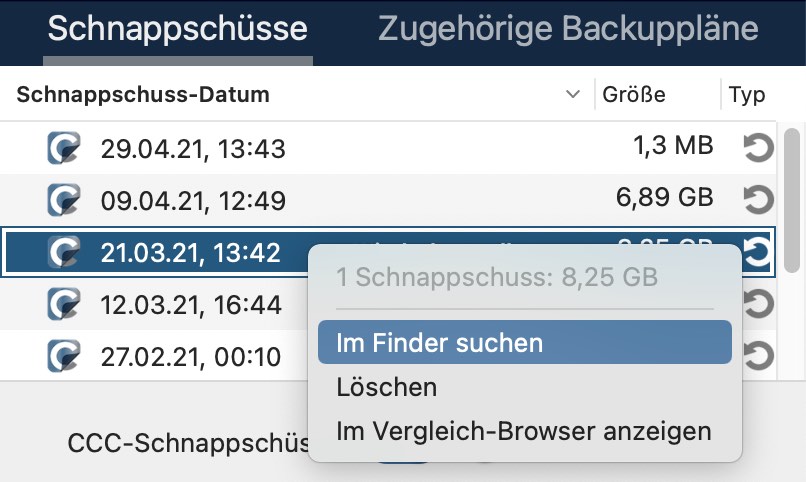
Wenn Sie eine ältere Version einer Datei wiederherstellen möchten, können Sie diese aus einem CCC-Schnappschuss wiederherstellen (was ist ein Schnappschuss?). Wählen Sie Ihr Zielvolume in der CCC Seitenleiste aus und führen dann einen Doppelklick auf einen Schnappschuss aus, um den Schnappschuss im Finder anzuzeigen. Die Inhalte werden im Nur-lesen-Modus angezeigt, Sie können also keine Änderungen vornehmen, die den Schnappschuss in seiner Funktion beeinträchtigen würden. Wenn Sie ein einzelnes Element wiederherstellen möchten, können Sie es einfach aus dem Schnappschuss an einen beliebigen Ort ziehen.
Wenn Sie versuchen, Systemdateien, Programme oder vielleicht sogar alles aus Ihrem Backup wiederherzustellen, fahren Sie mit einer der anderen unten aufgeführten Methoden fort.
Wiederherstellen eines Backups mit CCC
Wiederherstellen eines gesamten Volumes aus einem CCC Backup
Klicken Sie auf „Start“, um das Backup auszuführen
Wenn Sie eine große Datenmenge wiederherstellen möchten, ist CCC üblicherweise effizienter dabei als der Finder:
- Beenden Sie alle Anwendungen außer CCC
- Klicken Sie auf Wiederherstellen in der CCC Symbolleiste.
- Klicken Sie auf die Auswahl für Quelle und wählen Sie Ihr Backup-Volume als Quelle aus.
- Klicken Sie auf die Auswahl für das Ziel und wählen Sie Ihr ursprüngliches Quellvolume als Ziel aus (z. B. Macintosh HD).
- Wenn Sie nicht das gesamte Backup wiederherstellen möchten, klicken Sie auf Backupfilter unten im Fenster. Klicken Sie nun in der Werkzeugleiste auf Einschließen und markieren Sie die Objekte, die CCC wiederherstellen soll.
- Beachten Sie folgenden Warnhinweis. Wenn Sie nicht möchten, dass CCC Objekte vom Ziel löscht, klicken Sie auf die Zielauswahl und wählen Sie Nichts löschen aus dem SafetyNet-Untermenü aus.
- Klicken Sie auf Starten
Warnung: Wenn CCC Daten vom Backup wiederherstellt, könnten Dateien, die auf der Quelle nicht vorhanden sind, vom Ziel gelöscht werden. Dieses Verhalten ist beabsichtigt und meist erforderlich, um das gewünschte Resultat zu erzielen. Beachten Sie jedoch, dass bei Aussschluss von Objekten aus Ihrem Backup dieser Inhalt auch bei der Wiederherstellung entfernt wird. Wenn Sie dieses Verhalten nicht wünschen, klicken Sie auf die Zielauswahl und wählen Sie „Nichts löschen“ aus dem SafetyNet-Untermenü aus.
Hinweis: Einige Hintergrunddienste erkennen diese wiederhergestellten Daten möglicherweise erst nach deren Neustart (weil sie z. B. Statusdaten im Speicher behalten). Starten Sie nach der Wiederherstellung neu, falls Sie Daten in Ihrem Benutzerordner wiederherstellen.
Wiederherstellen einzelner Dateien aus einem Backup
Wiederherstellen eines Ordners aus einem CCC Backup
Wenn Sie einen bestimmten Ordner wiederherstellen möchten, sollten Sie den Umfang Ihres Wiederherstellungsplans genau festlegen, um unerwünschte Änderungen an anderen Daten auf dem Volume zu vermeiden:
- Beenden Sie alle Anwendungen außer CCC
- Klicken Sie auf Wiederherstellen in der CCC Symbolleiste.
- Klicken Sie auf die Auswahl für die Quelle und wählen Sie Ordner wählen …. Wählen Sie den Ordner auf dem Backup-Volume aus, den Sie wiederherstellen möchten.
- Klicken Sie auf die Auswahl für das Ziel und wählen Sie Ordner wählen …. Wählen Sie den Ordner auf dem ursprünglichen Quell-Volume aus, den Sie wiederherstellen möchten. Üblicherweise hat dieser Ordner denselben Pfad wie der auf der Quelle. Z. B. Wenn Sie (Ihr Backup-Volume) > Benutzer > ihrname > Schreibtisch wiederherstellen, wählen Sie Macintosh HD > Benutzer > ihrname > Desktop als Ziel.
- Wenn Sie nicht möchten, dass CCC Objekte vom Ziel löscht, klicken Sie auf die Auswahl für das Ziel und wählen Sie Nichts löschen aus dem SafetyNet-Untermenü aus.
- Klicken Sie auf Starten
Wiederherstellen Ihres Startvolumes aus einem alten Backup
Wenn Sie eine alte Version eines Backups wiederherstellen möchten, können Sie sie von einem Schnappschuss auf Ihrer Backup-Festplatte wiederherstellen.
- Beenden Sie alle Anwendungen außer CCC
- Klicken Sie auf Wiederherstellen in der CCC Symbolleiste.
- Wählen Sie Ihre Backup-Festplatte als Quelle für das Backup.
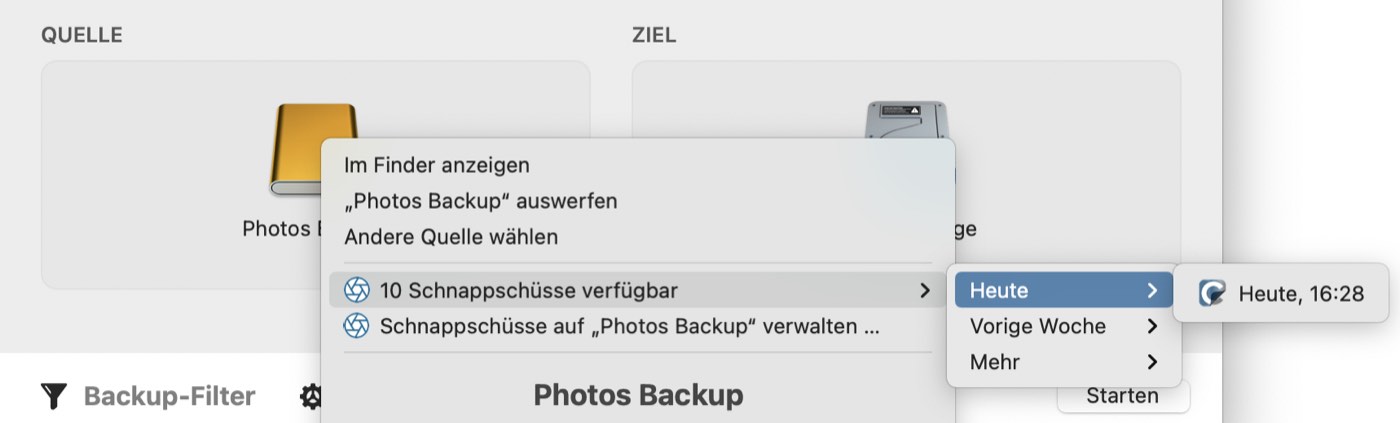
- Klicken Sie auf die Quellauswahl und wählen Sie einen bestimmten Schnappschuss aus dem Menü „verfügbare Schnappschüsse“.
- Klicken Sie auf die Zielauswahl, um ein Zielvolume oder einen Zielordner zu wählen.
- Klicken Sie auf „Start“, um das Backup auszuführen.
Wiederherstellen alter Versionen von Dateien mit dem CCC Schnappschuss-Navigator
Wiederherstellen einer alten Version einer bestimmten Datei aus einem CCC-Backup
Wenn Sie bestimmte Objekte wiederherstellen möchten, und insbesondere, wenn Sie die Inhalte von Schnappschüssen vergleichen oder eine bestimmte Version einer Datei suchen möchten, können Sie den CCC Schnappschuss-Navigator verwenden:
- Beenden Sie alle Anwendungen außer CCC
- Klicken Sie auf Wiederherstellen in der CCC Symbolleiste.
- Wählen Sie ein Quellvolume aus oder einen bestimmten Ordner von Ihrer Backup-Festplatte, falls Sie nur einen bestimmten Ordner wiederherstellen möchten.
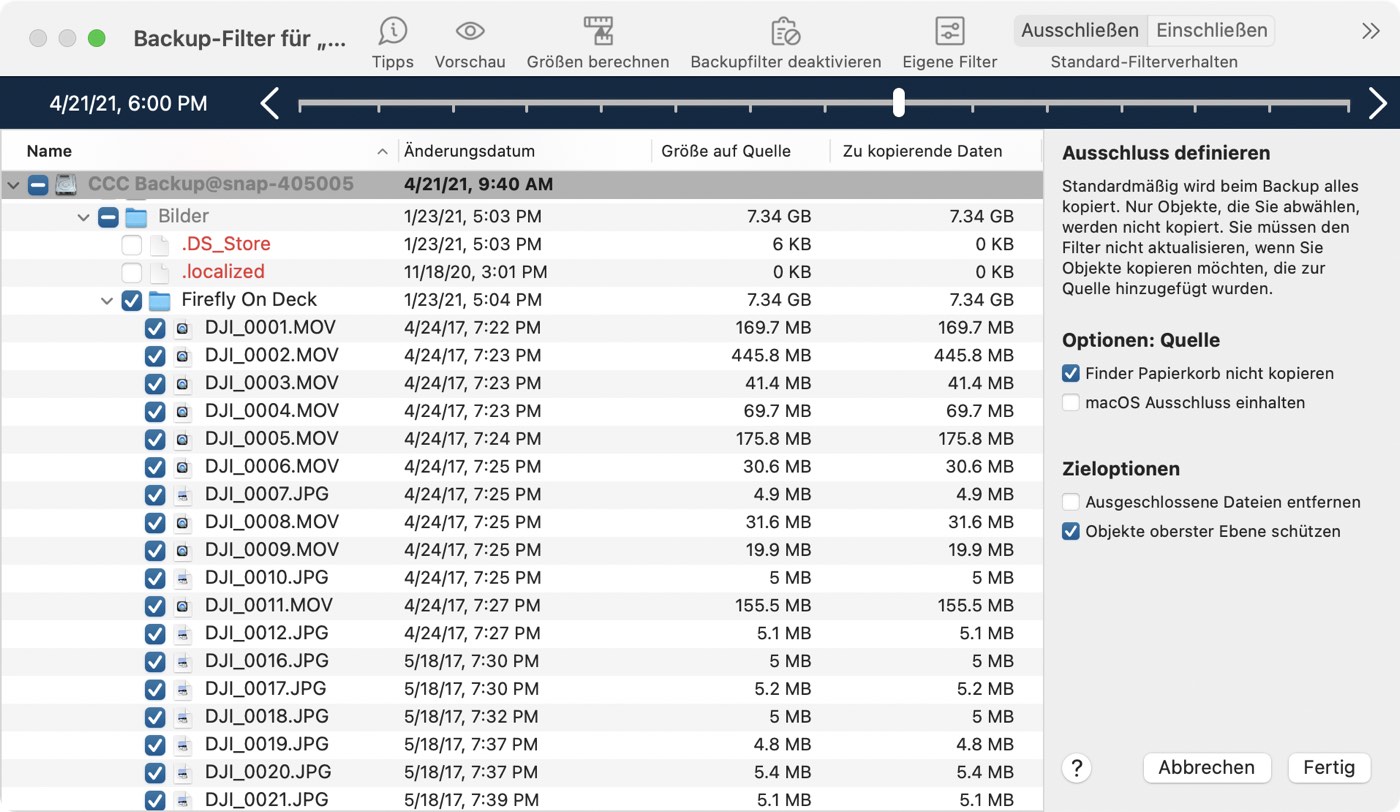
- Klicken Sie auf „Backupfilter“ am unteren Rand des Fensters, um die Oberfläche der Schnappschuss-Navigation zu öffnen.
- Klicken Sie auf Einschließen in der Werkzeugleiste, um das Standard-Filterverhalten auf Definiere, was enthalten sein soll zu setzen.
- Suchen Sie die Version Ihrer Dateien und Ordner, die Sie wiederherstellen möchten (weitere Informationen finden Sie unten)
- Aktivieren Sie die Kontrollkästchen neben den Objekten, die Sie wiederherstellen möchten.
- Klicken Sie auf „Fertig“.
- Klicken Sie auf die Zielauswahl, um ein Zielvolume oder einen Zielordner zu wählen.
- Wenn Sie nicht das gesamte Backup wiederherstellen wollen, klicken Sie auf die Zielauswahl und wählen Sie Nichts löschen aus dem SafetyNet-Untermenü aus.
- Startvolume-Einstellungen öffnen
Verwenden Sie den Schieberegler im Fenster “Backupfilter“, um bestimmte Schnappschüsse auszuwählen. Wählen Sie alternativ eine einzelne Datei aus, die Sie wiederherstellen möchten, und verwenden dann die Pfeiltasten an den Enden des Schiebereglers, um zur vorigen oder nächsten Version der Datei zu navigieren. Wenn Sie die Version des Objekts, das Sie wiederherstellen möchten, gefunden haben, können Sie entweder auf das Objekt rechtsklicken, um es im Finder anzuzeigen (und die Datei dann dorthin ziehen, wo Sie sie wiederherstellen möchten), oder den Backupfilter so konfigurieren, dass bestimmte Objekte an einem ausgewählten Ziel wiederhergestellt werden.
Hinweis: Einige Hintergrunddienste erkennen diese wiederhergestellten Daten möglicherweise erst nach deren Neustart (weil sie z. B. Statusdaten im Speicher behalten). Starten Sie nach der Wiederherstellung neu, falls Sie Daten in Ihrem Benutzerordner wiederherstellen.
Dateien aus einem SafetyNet-Schnappschuss auf dem Ziel wiederherstellen
Widerrufen eines Backups, das auf das falsche Volume kopiert wurde
SafetyNet ist ein Mechanismus, der Dateien auf dem Zielvolume vor versehentlichem Löschen schützt. Wenn Sie irrtümlicherweise das falsche Volume als Ziel auswählen oder wenn Sie Daten auf dem Ziel gespeichert haben, die nicht mit dem Quelldatensatz zusammenhängen, können Sie die verlorenen Daten auf dem Ziel aus dem SafetyNet-Schnappschuss wiederherstellen.
- Öffnen Sie CCC und wählen Sie in der Seitenleiste das betroffene Zielvolume aus.
- Wählen Sie in der Schnappschusstabelle den zutreffenden SafetyNet-Schnappschuss.
- Klicken Sie auf Wiederherstellen ….
- Überprüfen Sie die Einstellungen des von CCC erstellten Vorgangs und klicken Sie dann auf „Start“.
Wenn Sie mit der Wiederherstellung fortfahren, kopiert CCC die Dateien aus dem Schnappschuss zurück auf das eingestellte Ziel. Beachten Sie, dass CCC den Schnappschuss mit den wiederherzustellenden Dateien nicht löschen kann, bevor diese Dateien auf dem Ziel wiederhergestellt wurden. Daher muss das Ziel über ausreichend freien Speicherplatz für alle wiederherzustellenden Dateien verfügen. In manchen Fällen ist es nicht möglich, die Dateien auf dem ursprünglichen Ziel wiederherzustellen, sodass sie zuerst auf eine andere Festplatte kopiert werden müssen.
Zugehörige Artikel:
- Ausschließen von Dateien und Ordnern aus einem Backup
- „CCC meldet, dass das Ziel keinen Speicherplatz mehr zur Verfügung hat. Offensichtlich ist aber noch Speicherplatz vorhanden?!“
Wiederherstellen Ihres Startvolumes aus einem CCC Backup mithilfe des Migrationsassistenten
Wiederherstellen Ihres Macs von einem CCC-Backup
Sie können den Migrationsassistenten nutzen, um Daten aus einem CCC-Backup auf einem lokal verbundenen Speicher auf eine neue macOS-Installation zu übertragen. Befolgen Sie diese Schritte, um macOS neu zu installieren und Ihre Daten wiederherzustellen:
- Halten Sie beim Starten Ihres Mac Cmd+R (Intel Macs) oder die Einschalttaste (bei Apple Silicon Macs) gedrückt, um in den Recovery-Modus zu starten.
- Löschen Sie im Festplattendienstprogramm Ihre (neue) interne Festplatte mit APFS (siehe Knowledgebase-Artikel für nähere Informationen).
- Beenden Sie das Festplattendienstprogramm.
- Wählen Sie die Option macOS neu installieren zur Installation von macOS auf der neuen Festplatte.
- Wenn macOS zum ersten Mal von der neuen Festplatte startet, werden Sie gefragt, ob Sie Daten übertragen möchten – bestätigen Sie dies.
- Wählen Sie dann die Quelle für die Migration – Ihr CCC Backup-Volume† und fahren Sie gemäß den Anweisungen des Migrationsassistenten fort.
† Big Sur (und ältere Betriebssysteme): Der Migrationsassistent führt keine verschlüsselten und gesperrten (d.h. nicht aktivierten) Volumes auf und bietet auch keine hilfreiche Benutzerschnittstelle zum Entsperren und Aktivieren dieser Volumes an. Wenn Sie Daten von einem verschlüsselten Volume migrieren möchten, fahren Sie stattdessen mit der Erstellung eines neuen Benutzerkontos fort. Nach der Anmeldung werden Sie zum Entsperren des Volumes aufgefordert. Anschließend können Sie den Migrationsassistenten öffnen (Programme > Dienstprogramme > Migrationsassistent) und mit der Migration fortfahren.
Der Migrationsassistent akzeptiert kein Backup auf einem NAS-Speicher als Quelle für die Migration. Verwenden Sie die unten beschriebene Methode zur Wiederherstellung von Dateien und Ordnern aus einem NAS-Backup.
Zugehörige Artikel
Umgehen der Einschränkung des Migrationsassistenten
Es gibt eine Menge Fälle, in denen der Migrationsassistent ein Volume nicht als Quelle für die Migration von Inhalten akzeptiert. Wenn Sie beispielsweise ein Volume haben, das unter Beachtung der Groß- und Kleinschreibung formatiert ist, können Sie mit dem Migrationsassistenten keine Inhalte von diesem Volume auf ein Startvolume migrieren, das ohne Beachtung der Groß- und Kleinschreibung formatiert ist. Auch wird der Migrationsassistent das Volume nicht als Quelle akzeptieren, wenn auf dem Volume keine Ressourcen für Benutzerkonten vorhanden sind (z. B. weil sie vom Backup ausgeschlossen wurden oder weil sie beschädigt sind). CCC kann in solchen Fällen helfen.
- Wenn Sie gerade den Setup-Assistenten zum erstmaligen Starten verwenden, lehnen Sie das Migrationsangebot ab und fahren stattdessen mit der Erstellung eines neuen Benutzerkontos fort.
- Öffnen Sie das Festplattendienstprogramm.
- Wählen Sie im Menü „Darstellung“ die Option „Alle Geräte einblenden“.
- Wählen Sie das Startvolume aus (jedes mit dem Startvolume oder seinem übergeordneten Container verbundene Volume).
- Klicken Sie in der Symbolleiste auf „+“, um dieses Volume hinzuzufügen. Nennen Sie es z. B. „Macintosh“ (oder vergeben Sie einen anderen Namen, mit dem Sie langfristig zufrieden sind).
- Öffnen Sie CCC und konfigurieren Sie einen neuen Backupplan zum Wiederherstellen Ihres Backups auf das „Macintosh“ Volume (Sie können auch eine ältere Version Ihres Backups wiederherstellen).
- Wenn der Backupplan abgeschlossen ist, installieren Sie macOS auf dem Volume „Macintosh“.
- Sobald die macOS Installation abgeschlossen ist, kehren Sie zum Festplattendienstprogramm zurück und löschen Sie die „Macintosh HD“ Volume-Gruppe, um den von ihr belegten Speicherplatz wieder freizugeben.
Wiederherstellen des Startvolumes von einer alten startfähigen Kopie von macOS
Diese Anleitung gilt nur für macOS Catalina. Wir empfehlen Ihnen, die Anleitung im vorigen Abschnitt zu verwenden, um das Startvolume auf einem Mac unter Big Sur oder neuer wiederherzustellen.
1. Starten Sie Ihren Mac von der Backup-Festplatte
Verbinden Sie die Backup-Festplatte mittels USB- oder Thunderbolt-Kabel mit dem Mac.
Halten Sie beim Starten des Macs die alt-Taste gedrückt. Ihre Backup-Festplatte sollte als Startvolume im Startup Manager aufgeführt sein.
Hinweis: Wenn Sie Ihren Mac nicht von der Backup-Festplatte starten können, verwenden Sie die oben beschriebene alternative Vorgehensweise.
2. Volume vorbereiten, auf dem die Wiederherstellung erfolgt
Sofern Sie nicht nur einige wenige Einzeldateien wiederherstellen, wird empfohlen, das Backup auf einem frisch formatierten Volume wiederherzustellen. Unter Vorbereiten der Backup-Festplatte auf eine macOS Sicherung finden Sie eine genaue Anleitung, wie das Ziel formatiert wird. Bedenken Sie bitte, dass dies besonders wichtig ist, wenn Sie ein macOS-Startvolume wiederherstellen.
3. Öffnen Sie CCC
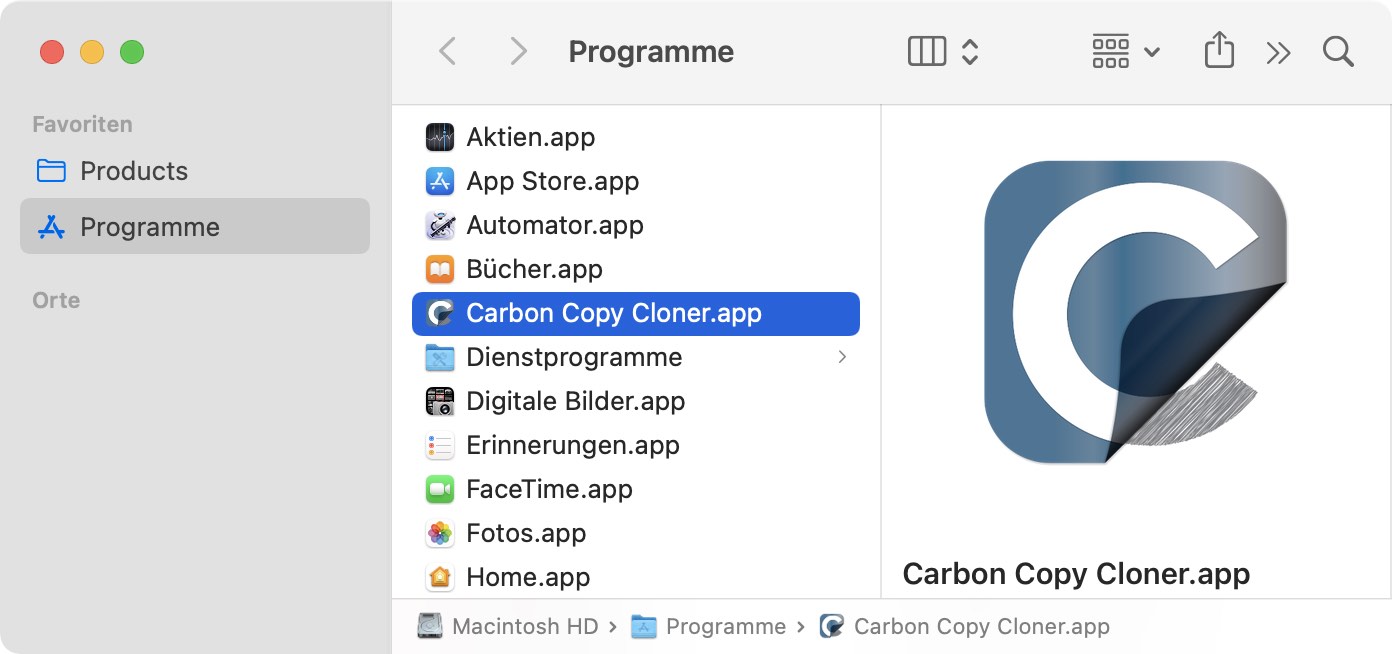
Sobald der Neustart Ihres Macs abgeschlossen ist, öffnen Sie CCC. Programme > Carbon Copy Cloner
Hinweis: Wenn Sie CCC auf dem Backup-Volume öffnen, bietet Ihnen CCC an, Sie durch die Einrichtung eines Backups zu führen. Verzichten Sie darauf, meldet CCC, dass Ihre geplanten Backups angehalten sind. Wenn Sie dazu aufgefordert werden, lassen Sie Ihre Backups in diesem inaktiven Zustand. Gleichermaßen klicken Sie auf „Änderungen verwerfen“, wenn Sie gebeten werden, Ihre Backups zu sichern.
4. Neuen Wiederherstellungsplan erstellen
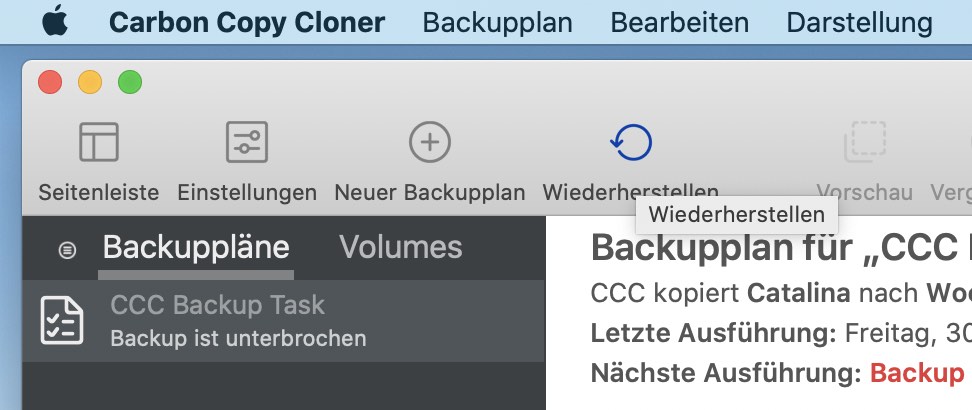
Klicken Sie auf Wiederherstellen in der Symbolleiste oder wählen Sie Neuer Wiederherstellungsplan aus dem Backuppläne-Menü aus.
5. Quelle auswählen
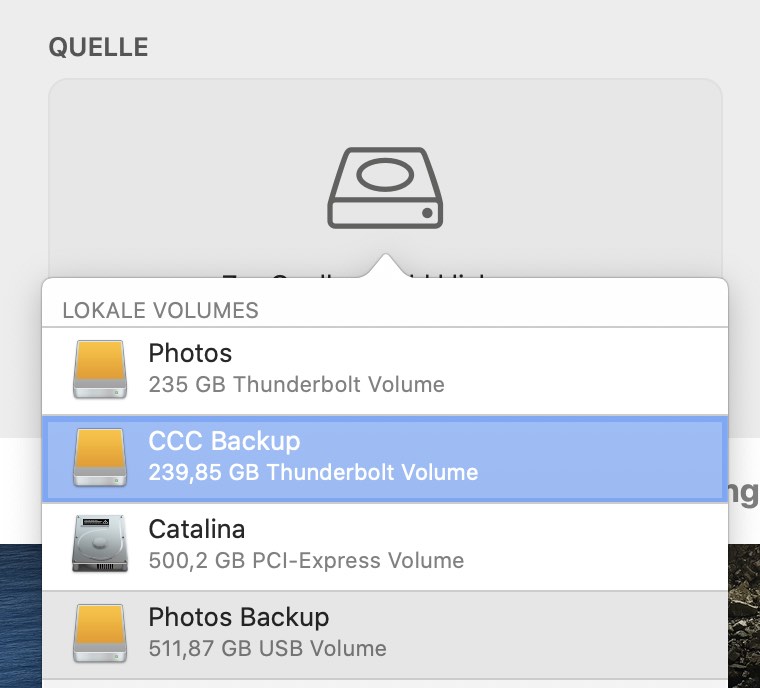
Klicken Sie auf das Symbol im Feld „Quelle“, um die verfügbaren Quellen anzuzeigen. Wählen Sie Ihr Backup-Volume als Quelle aus. Sie müssen das System- und das Daten-Volume nicht separat wiederherstellen – CCC stellt beide Volumes wieder her.
6. Ziel auswählen
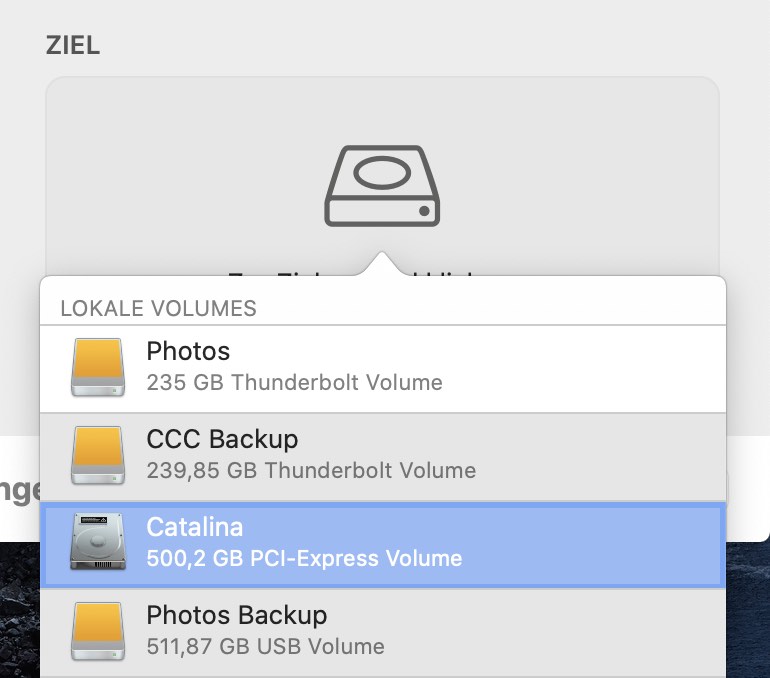
Klicken Sie auf das Symbol im Feld „Ziel“, um die verfügbaren Ziele anzuzeigen. Wählen Sie nun das Volume aus, auf dem die Daten wiederhergestellt werden sollen.
7. Auf „Start“ klicken
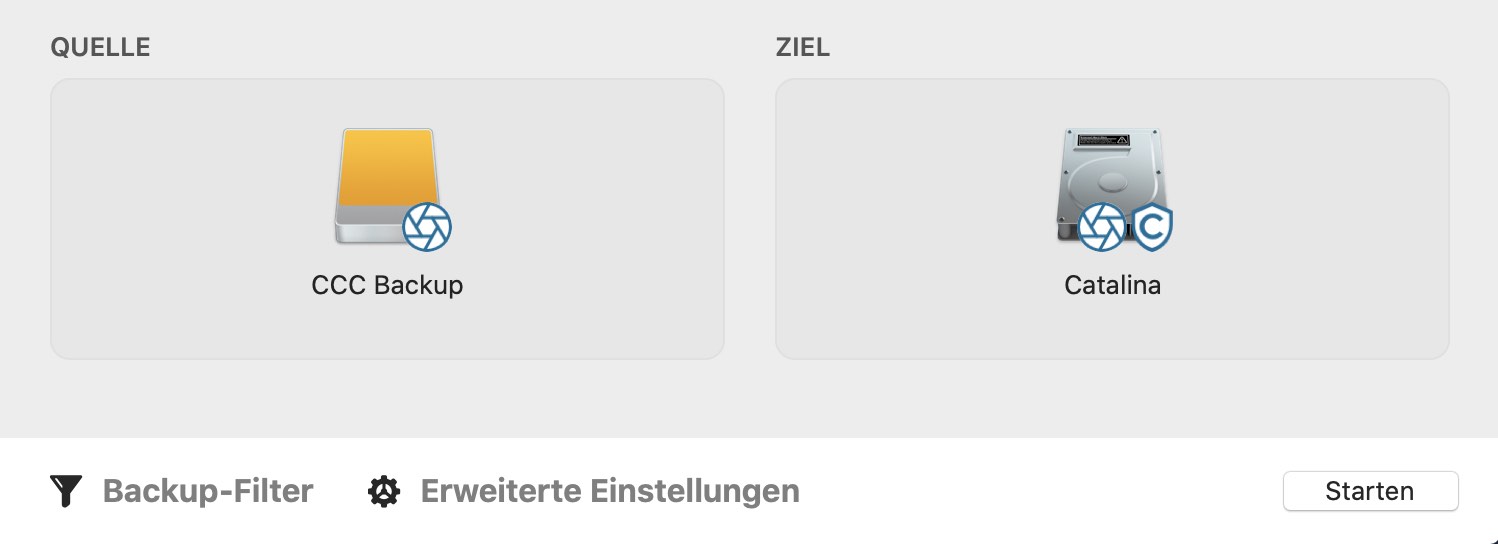
Klicken Sie unten rechts auf „Start“, um die Wiederherstellung zu starten.
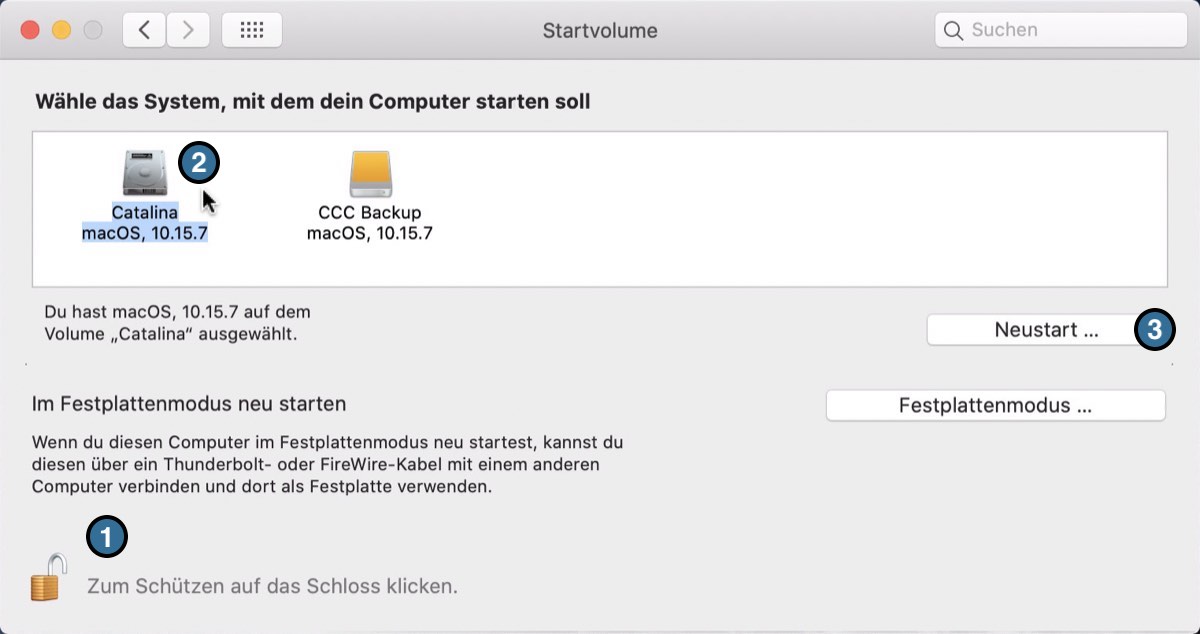
8. Startvolume zurücksetzen
Startvolume-Einstellungen öffnen
Wählen Sie nach Abschluss des Wiederherstellens im Menü Dienstprogramme von CCC die Option Startvolume und klicken unten im Fenster auf das Schloss, um sich zu authentifizieren.
Zugehörige Artikel
- Fehlerbehebung für „Externes Starten“
- Wiederherstellen von einem Disk Image
- „Ich habe ein vollständiges Backup in einem Ordner oder Disk Image. Wie kann ich alles wiederherstellen?“
Wiederherstellung aus einem Datenbackup auf einem NAS oder einer Netzwerkfreigabe
So stellen Sie Daten aus einem Ordner auf einem NAS-Volume wieder her:
- Alle Anwendungen und alle Finder-Fenster schließen
- Öffnen Sie CCC und klicken auf Wiederherstellen in der CCC Symbolleiste, um einen neuen WIederherstellungsplan zu erstellen
- Ziehen Sie den Ordner, den Sie aus der Netzwerkfreigabe wiederherstellen möchten auf die Quellauswahl von CCC
- Erstellen Sie einen neuen Ordner an dem Ort, an dem Sie die Daten wiederherstellen möchten
- Ziehen Sie diesen neuen, leeren Ordner in die Zielauswahl von CCC
- Klicken Sie auf „Starten“
Migrieren von Daten von einem Apple Silicon Mac, der im „Volume teilen“ Modus gestartet ist
Mit der Einführung der Apple Silicon Macs hat Apple den „Festplattenmodus“ (Target Disk Mode) durch den neuen „Volume teilen“ Modus ersetzt. Im Festplattenmodus verbinden Sie einfach zwei Macs per Firewire oder USB, und die Volumes des Macs im Festplattenmodus verhalten sich wie lokal verbundene Festplatten. Diese Verbindung ist grundsätzlich kompatibel mit dem Migrationsassistenten. Der „Volume teilen“ Modus ist ein ganz anderes Biest. Anstatt sich wie ein lokal verbundenes Gerät zu verhalten, teilt der Mac ein spezifisches Volume über SMB-Dateifreigabe. Das dadurch sichtbare Volume ist nicht mit dem Migrationsassistenten kompatibel, und aufgrund einiger Einschränkungen seitens des SMB-Dienstes auf dem teilenden Mac werden Programme, die über den Finder kopiert wurden, nicht ordnungsgemäß funktionieren.
CCC kann diese Einschränkungen umgehen und ein Backup auf einem Mac im „Volume teilen“ Modus erstellen, das funktionierende Programme anbietet und mit dem Migrationsassistenten kompatibel ist. Idealerweise verfügen Sie über ein einfaches CCC-Backup der Festplatte des Macs im „Volume teilen“ Modus (also ein Backup, das erstellt wurde, als der Mac von der eigenen Festplatte gestartet wurde), aber wenn Sie diesen Mac nur per „Volume teilen“ erreichen können, dann nutzen Sie die folgenden Schritte zum Migrieren Ihrer Daten von diesem Mac.
- Folgen Sie den Apple Anweisungen zum Teilen des Startvolumes eines anderen Macs
- Löschen Sie eine neue Festplatte als neues Backup-Volume im Festplattendienstprogramm, damit Sie diese als Ziel für Ihren Backupplan verwenden können, oder fügen Sie ein Volume zu einer vorhandenen Backup-Festplatte hinzu, die ausreichend Speicherplatz dafür zur Verfügung hat.
- Klicken Sie auf Neuer Backupplan in der CCC Symbolleiste.
- Wählen Sie das geteilte Volume als Quelle aus.
- Wählen Sie Ihr lokales Backup-Volume als Ziel aus. Wählen Sie nicht ihr aktuelles Startvolume als Ziel für diesen Backupplan aus.
- Klicken Sie auf Starten, um das Backup auszuführen.
- Ist das Backup abgeschlossen, werfen Sie das geteilte Volume aus und trennen Sie die Verbindung zum zweiten Mac.
- Öffnen Sie den Migrationsassistenten und migrieren Sie die Daten vom CCC-Backup-Volume.
CCC führt während einer Wiederherstellung keine geplanten Backups aus
Zur Vermeidung von möglichen Konflikten sieht CCC davon ab, während einer Wiederherstellung geplante Backups auszuführen. Dies dient der Vermeidung von versehentlichen Fehlern, wenn z. B. das Backup überschrieben wird, während Sie es auf ein anderes Volume wiederherstellen. Wenn Sie einen nicht zugehörigen Backupplan trotzdem während der Wiederherstellung ausführen möchten, können Sie dieses Backup manuell anstoßen und den Sicherheitsmechanismus von CCC übergehen.